
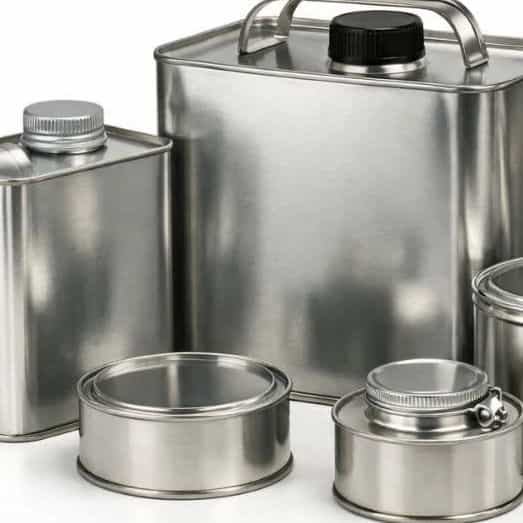
The production process of metal paint cans
Metal cans used in the paint industry are usually produced from tinned steel sheet (tinplate). This type of sheet is considered the best option for packaging paint and chemicals due to its corrosion resistance, proper strength, and printability. The production of metal cans is a multi-stage industrial process that begins with the selection of the appropriate sheet and continues until the packaging and sending of the cans to the paint factories.
Selection and quality control of tin plate sheet
The first step in the production of metal cans is to choose the right sheet. At this stage, the low-carbon steel sheet with tin coating is selected so that, in addition to mechanical strength, it has good resistance against rusting.
In the initial control, the following items are checked:
- Thickness of the sheet and its uniformity
- The amount and uniformity of the tin coating
- The quality of the surface and the absence of scratches
- Compliance with the manufacturer's quality certificate
These checks ensure that the raw materials are suitable for the production of standard cans.
Cutting coils and preparing sheets
Tinplate sheets usually enter the factory in the form of Coil. These coils are opened in the production line and become flat sheets or sheets after smoothing.
The steps in this section include the following:
- Putting the coil on the opening machine
- Smoothing the sheet to remove the stresses
- Cutting the sheet into large sheets with specific dimensions
These sheets are later used to produce the body, bottom and rim of the can.
Inner varnish of the can
To prevent the chemical reaction between the metal and the paint, the inner surface of the sheets is covered with special protective varnish. This varnish is highly resistant to solvents and resins in the paint.
Features of this stage:
- Applying varnish by rollcoat or spray method
- Creating a uniform coating on the inner surface
- Cooking in the oven to stabilize the protective layer
This layer prevents can corrosion and color quality change.
Printing and outer cover of the can
After internal varnishing, the outer surface of the sheets is prepared for printing. At this stage, the graphic design includes the brand, product specifications and safety warnings on the printed sheet.
The steps of this section are:
- Design printing by Metal offset printing
- Printing quality control and color alignment
- Application of protective varnish layer
- Cooking in oven to increase print resistance
This process increases the durability of printing against moisture, scratches and transportation.
Metal can body production
After the printed sheets are ready, they are cut into rectangular pieces called body blanks. These parts are turned into cylindrical shape in special machines.
The main steps of this section:
- Cutting the sheet into body blanks
- Rolling the sheet to create a cylindrical shape
- Connecting the longitudinal edges with resistance welding
- Controlling the quality of the weld seam
- Laking the welding area to prevent corrosion
In some cans, grooves called Beading are created on the body to increase the strength of the body.
Production of can bottoms and door rims
To complete the structure of the can, other parts are also produced from tinplate.
Production of the bottom of the can
- Punching circular discs from the sheet
- Forming the edge to create double seam
Production of door rims
- Cutting or punching the rim piece
- Forming in a special mold
- Preparing the place to lock the cover
If needed, the inner surface of these parts is also varnished and baked in the furnace.
Metal can assembly
At this stage, the different components of the can are connected to each other.
The most important assembly operations are:
- Connecting the bottom of the can to the body with Double Seam
- Connecting the rim of the door to the upper part of the body
- Exactly controlling the dimensions of the seam for complete sealing
This type of connection is one of the most important factors to prevent leakage in metal cans.
Leakage testing and quality control
After assembly, the cans are subjected to various tests to ensure their quality.
Some of the most important controls include:
- Leakage test with pressurized air or gas
- Measuring the diameter, height and thickness of the sheet
- Controlling the width and depth of the seams
- Checking the uniformity of the internal varnish
- Controlling the quality of external printing
Cans that do not meet the required standards are removed from the production line.
Installation of earrings and handles
For paint cans, easy portability is very important. For this reason, the transport equipment is installed at this stage.
Steps of this section:
- Punch the place of installing earrings on the body
- Installing metal earrings
- Putting a wire or wire handle
- Controlling the strength of the connection
These parts should be able to withstand the weight of the can full of paint well.
Packing and shipping cans
At the final stage, the manufactured cans are packed to be sent to paint factories.
The steps of this section include:
Information on the label usually includes the following:
- Can size
- Quantity per pallet
- Production batch number
- Production date
- Customer information
After this stage, the cans are sent to paint factories and after being filled with paint, they enter the distribution network and consumer market.
Your reviews and experiences
What do you think?
Help us create better content by submitting your rating.